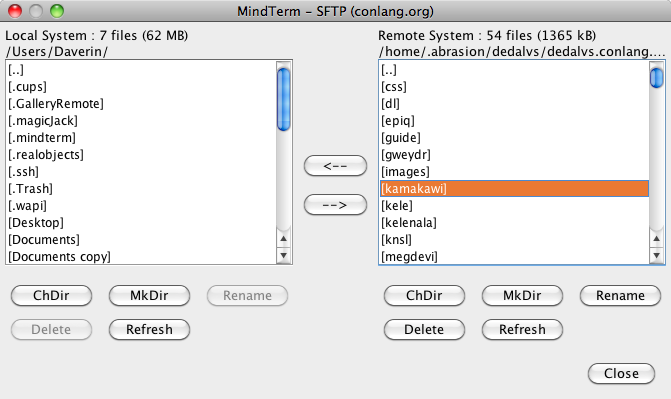
SSH Client

This page launches AppGate MindTerm, a Java based Secure SHell terminal. It may help users in situations where they cannot run SSH to access their conlang.org accounts, such as at a library.

To access the applet, click the link below:

Click Here to Run the SSH Applet!

Note: This applet is not endorsed or verified in any way by the LCS. Use at your own risk.
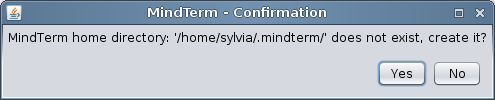
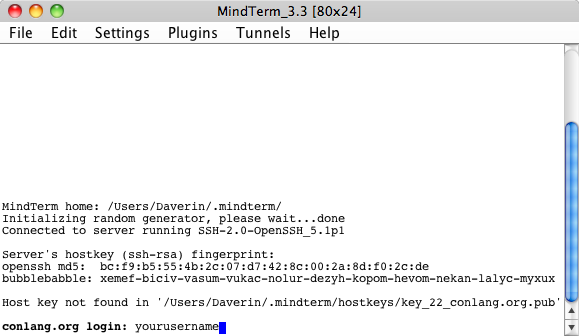
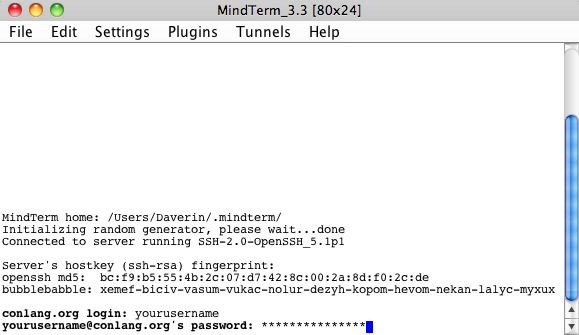
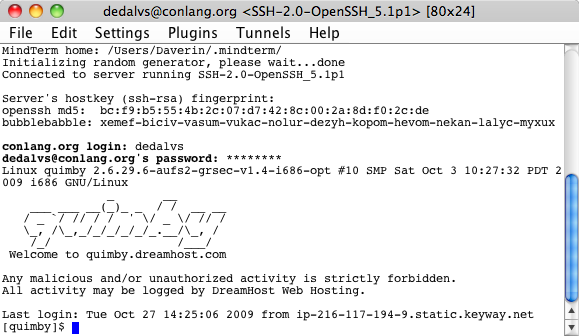
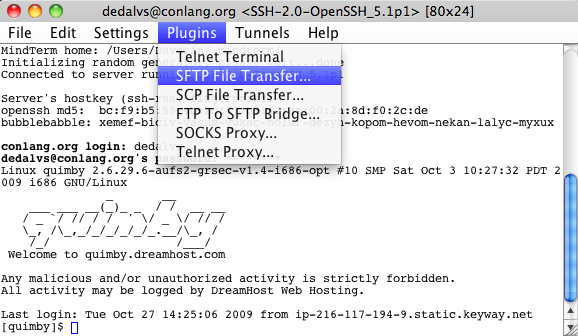
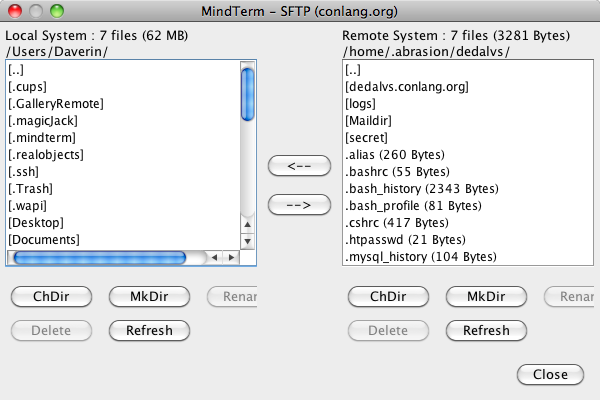
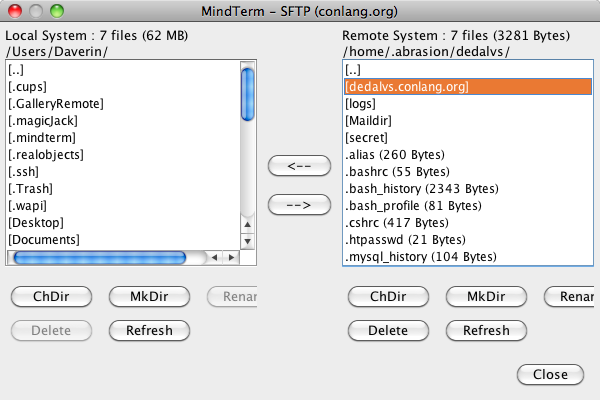
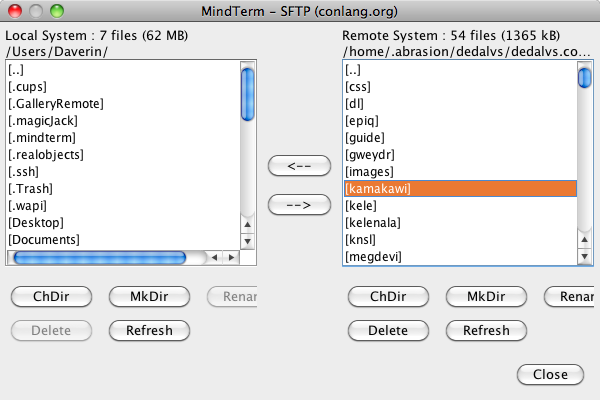
Applet Instructions

Step 1

Click on the link above to go to the SSH applet launch page (or, alternatively, click here). (Note: If you’ve run the applet before, skip to Step 2.)

Step 1A

Before running the applet, you may be prompted by your web browser several times. The first warning will inform you that the security of the applet cannot be verified. You should ignore this and click either “allow” or “run” (depending on what your browser displays).

Step 1B

Next, the Java applet window will open (called MindTerm_3.3), and you’ll be asked to accept the MindTerm license agreement (or “agreeement”, as they call it). You must accept the agreement to use the SSH client.

Step 1C (Windows)

Next you’ll be prompted to create a directory. This directory is required by the applet to operate. Essentially, it’s just a folder that lives in your hard drive to store procedural information. On the left is an image showing where the directory will be installed on Windows machine (replace “Sylvia” with your computer’s user name):

Step 1C (Mac)

Next you’ll be prompted to create a directory. This directory is required by the applet to operate. Essentially, it’s just a folder that lives in your hard drive to store procedural information. On the left is an image showing where the directory will be installed on a Macintosh (replace “Daverin” with your home directory):

Step 1C (Linux)

Next you’ll be prompted to create a directory. This directory is required by the applet to operate. Essentially, it’s just a folder that lives in your hard drive to store procedural information. On the left is an image showing where the directory will be installed on a machine running Linux (replace “Sylvia” with your home directory):

Step 1D

In the new directory that’s been created, you’ll now be asked to create a new file. Click “Yes” to proceed. On the left is an example of the request (using a Mac):

Step 1E

Finally, you’ll be asked to add the host to your list of known hosts. Click “Yes” to proceed. On the left is an example of the request (using a Mac):

Step 2

You should now interact directly with the applet, which will have opened in a new window in the upper right-hand corner of your screen. First, it will prompt you for your username. Enter your conlang.org user name (the one you use to edit your site) where prompted. See image on the left for an example:

Step 3

Next you’ll be prompted for your password. Use the same password associated with your conlang.org username. See image on the left for an example:

Step 4

Provided everything has worked up to this point, you should be logged into Quimby: Conlang.org’s server. The screen should look something like what you see on the left:

Step 4A

Now that you’re here, though, you no longer use the cursor. Instead, go up to the applet window’s menu and select “Plugins”. From the Plugins drop-down menu, then, select “SFTP File Transfer…”, as shown on the left:

Step 5

Now you’re logged in! On the left is an image showing you what the Java applet looks like. On the left is a window showing you your top level directory on your computer, and on the right your entry directory for your webspace (using dedalvs.conlang.org as an example):

Step 6

To modify the web portion of your webspace (the part that web browsers can view), you have to click into your public directory. To do so, select your public directory (it’ll be the one that ends in .conlang.org) and double click:

Step 7

Now you’re in! Your public directory should look something like this (with your content on the right side, of course):

Step 7A

From here, you can do the following (in either your webspace, on the right, or on your computer, on the left):

  • MkDir: Create a new folder.
  • ChDir: Change where a file or folder is located (like moving a file or folder).
  • Rename: Change the name of a file or folder.
  • Delete: Delete a file or folder.

(continued on next slide)

Step 7B

(continued from last slide)

  • Refresh: Refresh a directory (to show new files or folders that have been added).
  • Upload: By means of the –> button (the file must be created on your computer first before it can be uploaded).
  • Download: By means of the <– button (the file must be present on your webspace in order to be downloaded).
  • Close: End your session.

Step 7C

And, as a quick note, you can, of course, enlarge or shrink the window as you see fit (so that, for example, the buttons appear completely on the screen):

Step 8

Finally, when you’re done, you can close the window in the conventional way (or click “Close”), and when you do so, you’ll be asked if you want to log out:

Questions?

You’re done! If you have any questions, feel free to contact us via the usual means.